We often get asked about our design process during the initial stages of a project [RIBA Stages 1 & 2]. Our clients are keen to understand how our proposals for their project develop. For us, the following steps are critical. They allow us to develop a beautiful, contextual and comfortable building which is particular to a given site and client brief.
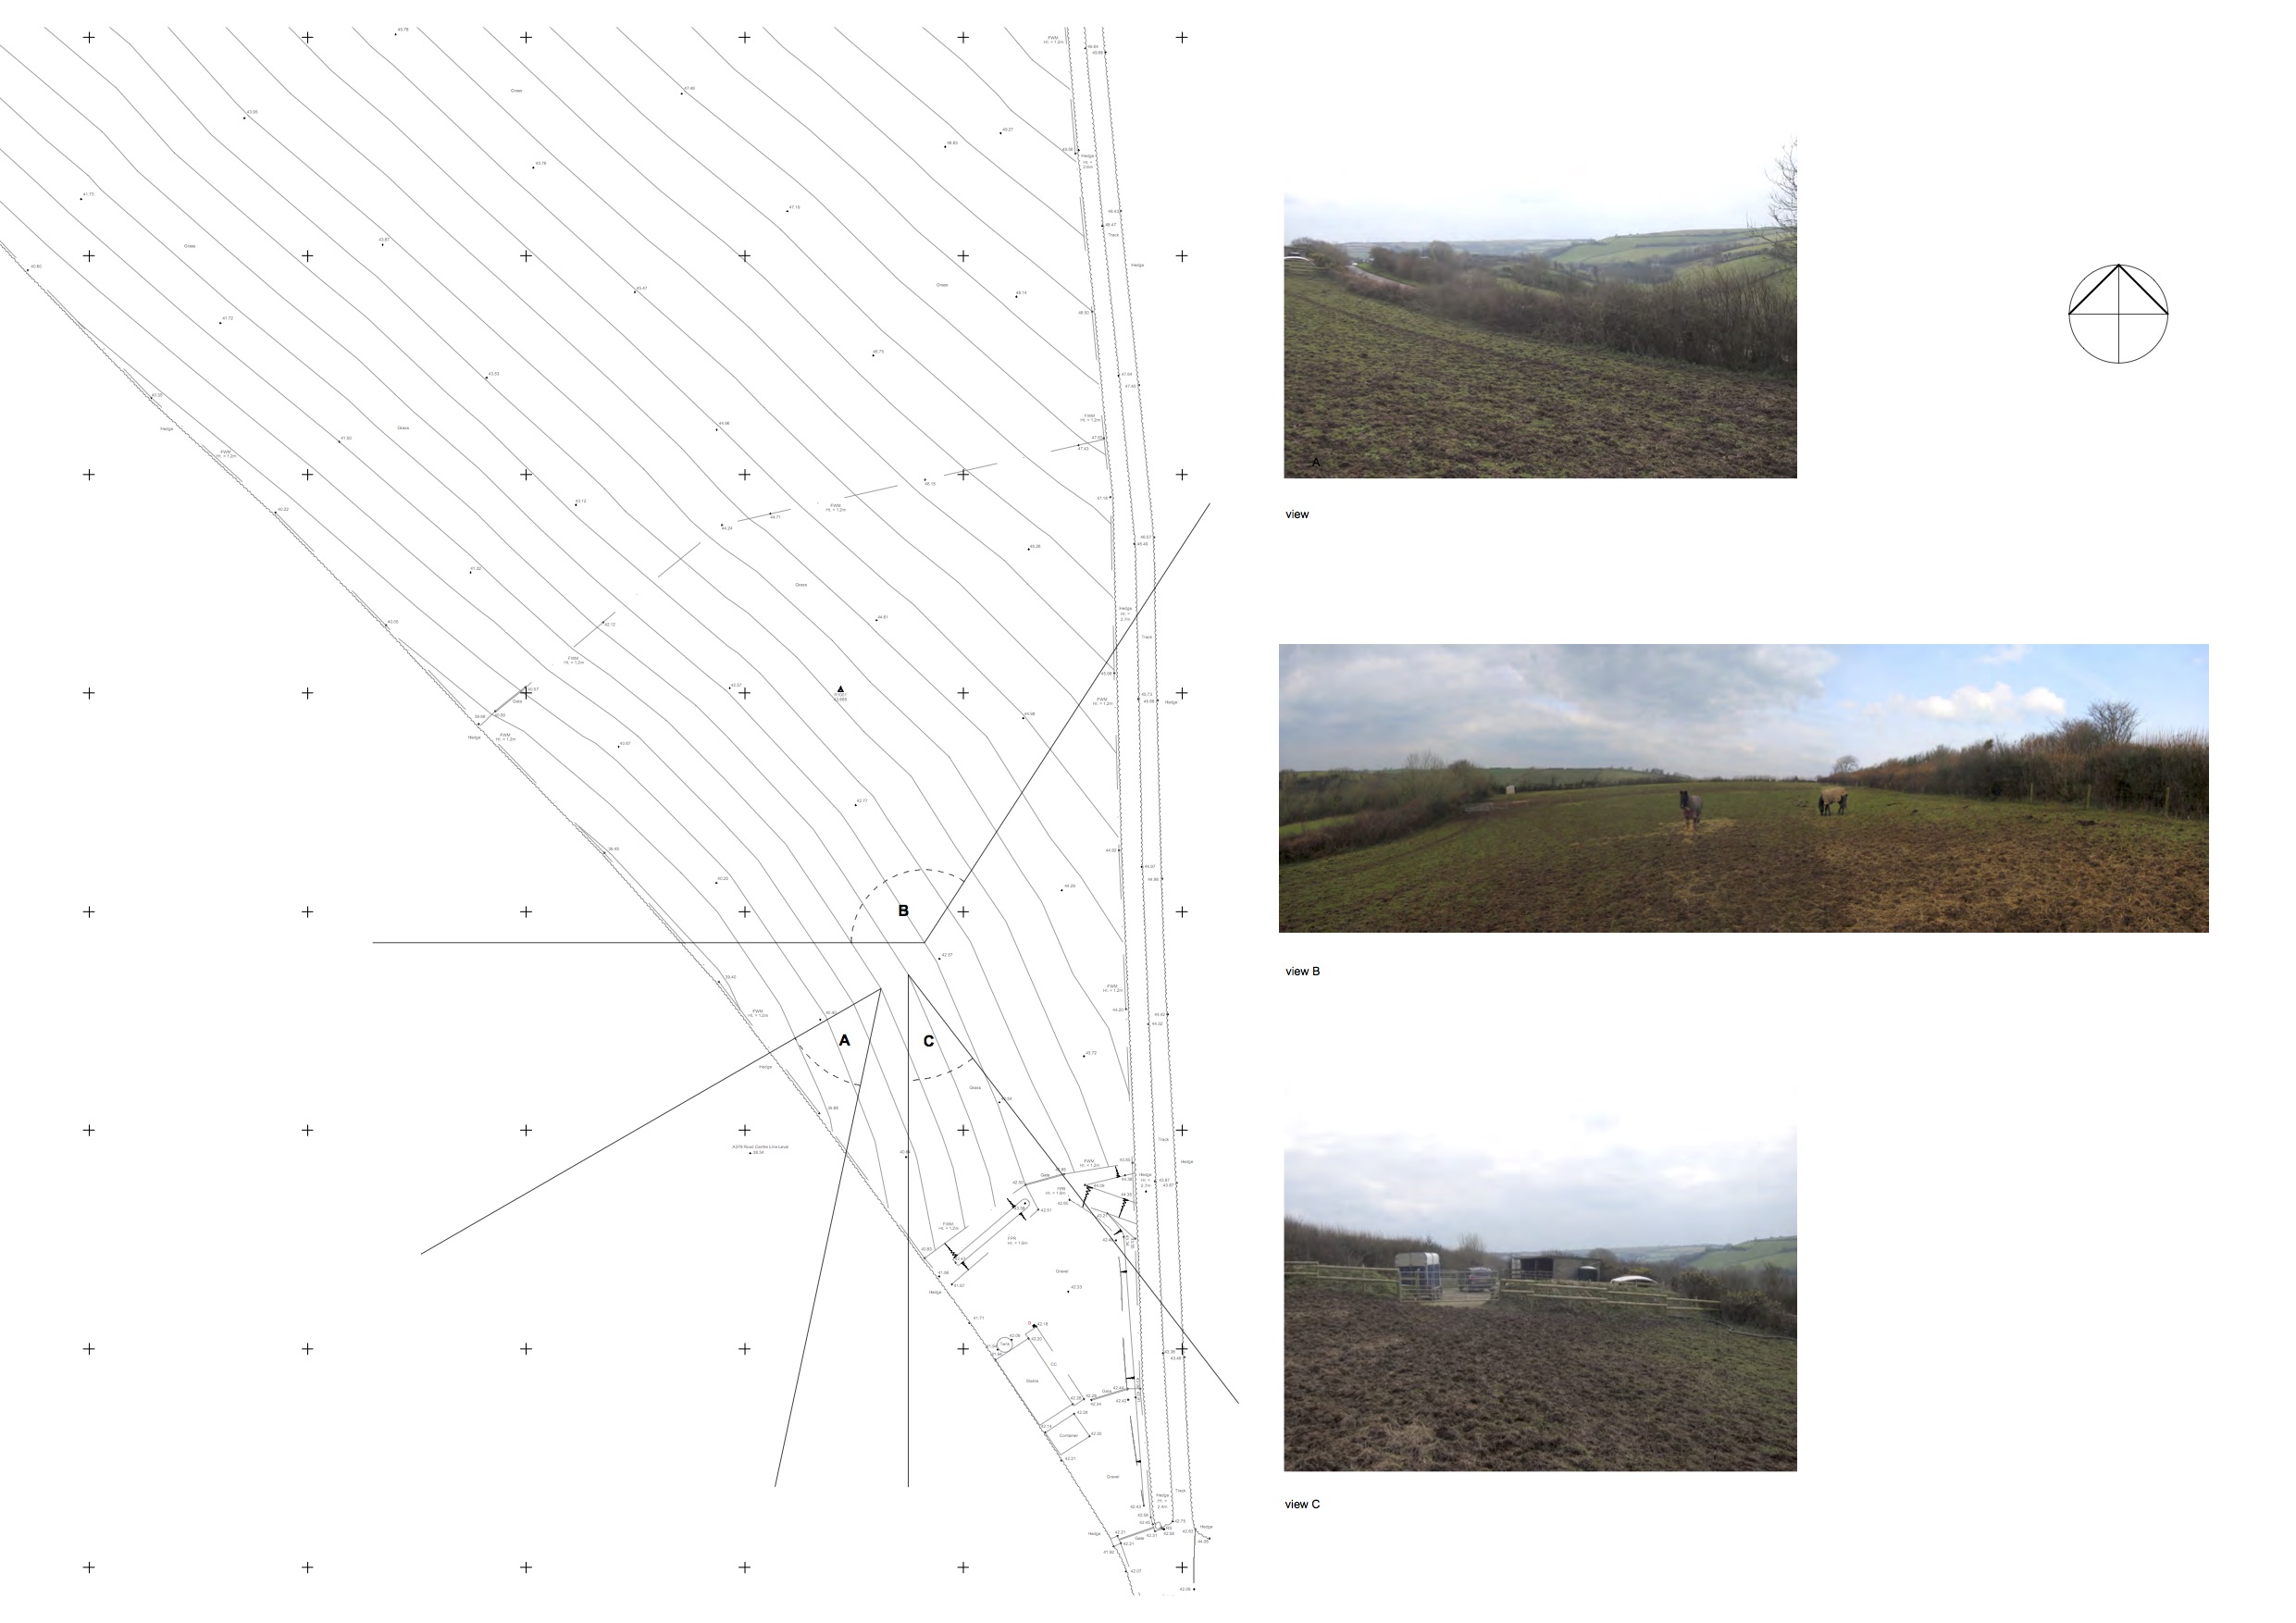
Step 1: Understand the Site
We spend time drawing the site to understand what makes it unique. We are strong believers that good architecture should respond to its surroundings and be firmly rooted in its site.
Step 2: Understand Your Brief
Every client is unique, that’s why we take time to understand your requirements. We’ll carefully consider your budget, time frame, brief and design preferences before we start to develop proposals.
Our initial drawings may raise as many questions as they answer. We see this as part of the briefing process and a time for your to continue to question exactly what you want the project to achieve. This is perfectly normal as it may be the first time you have ever considered how a space, tailored to your needs, can add value to your daily life.
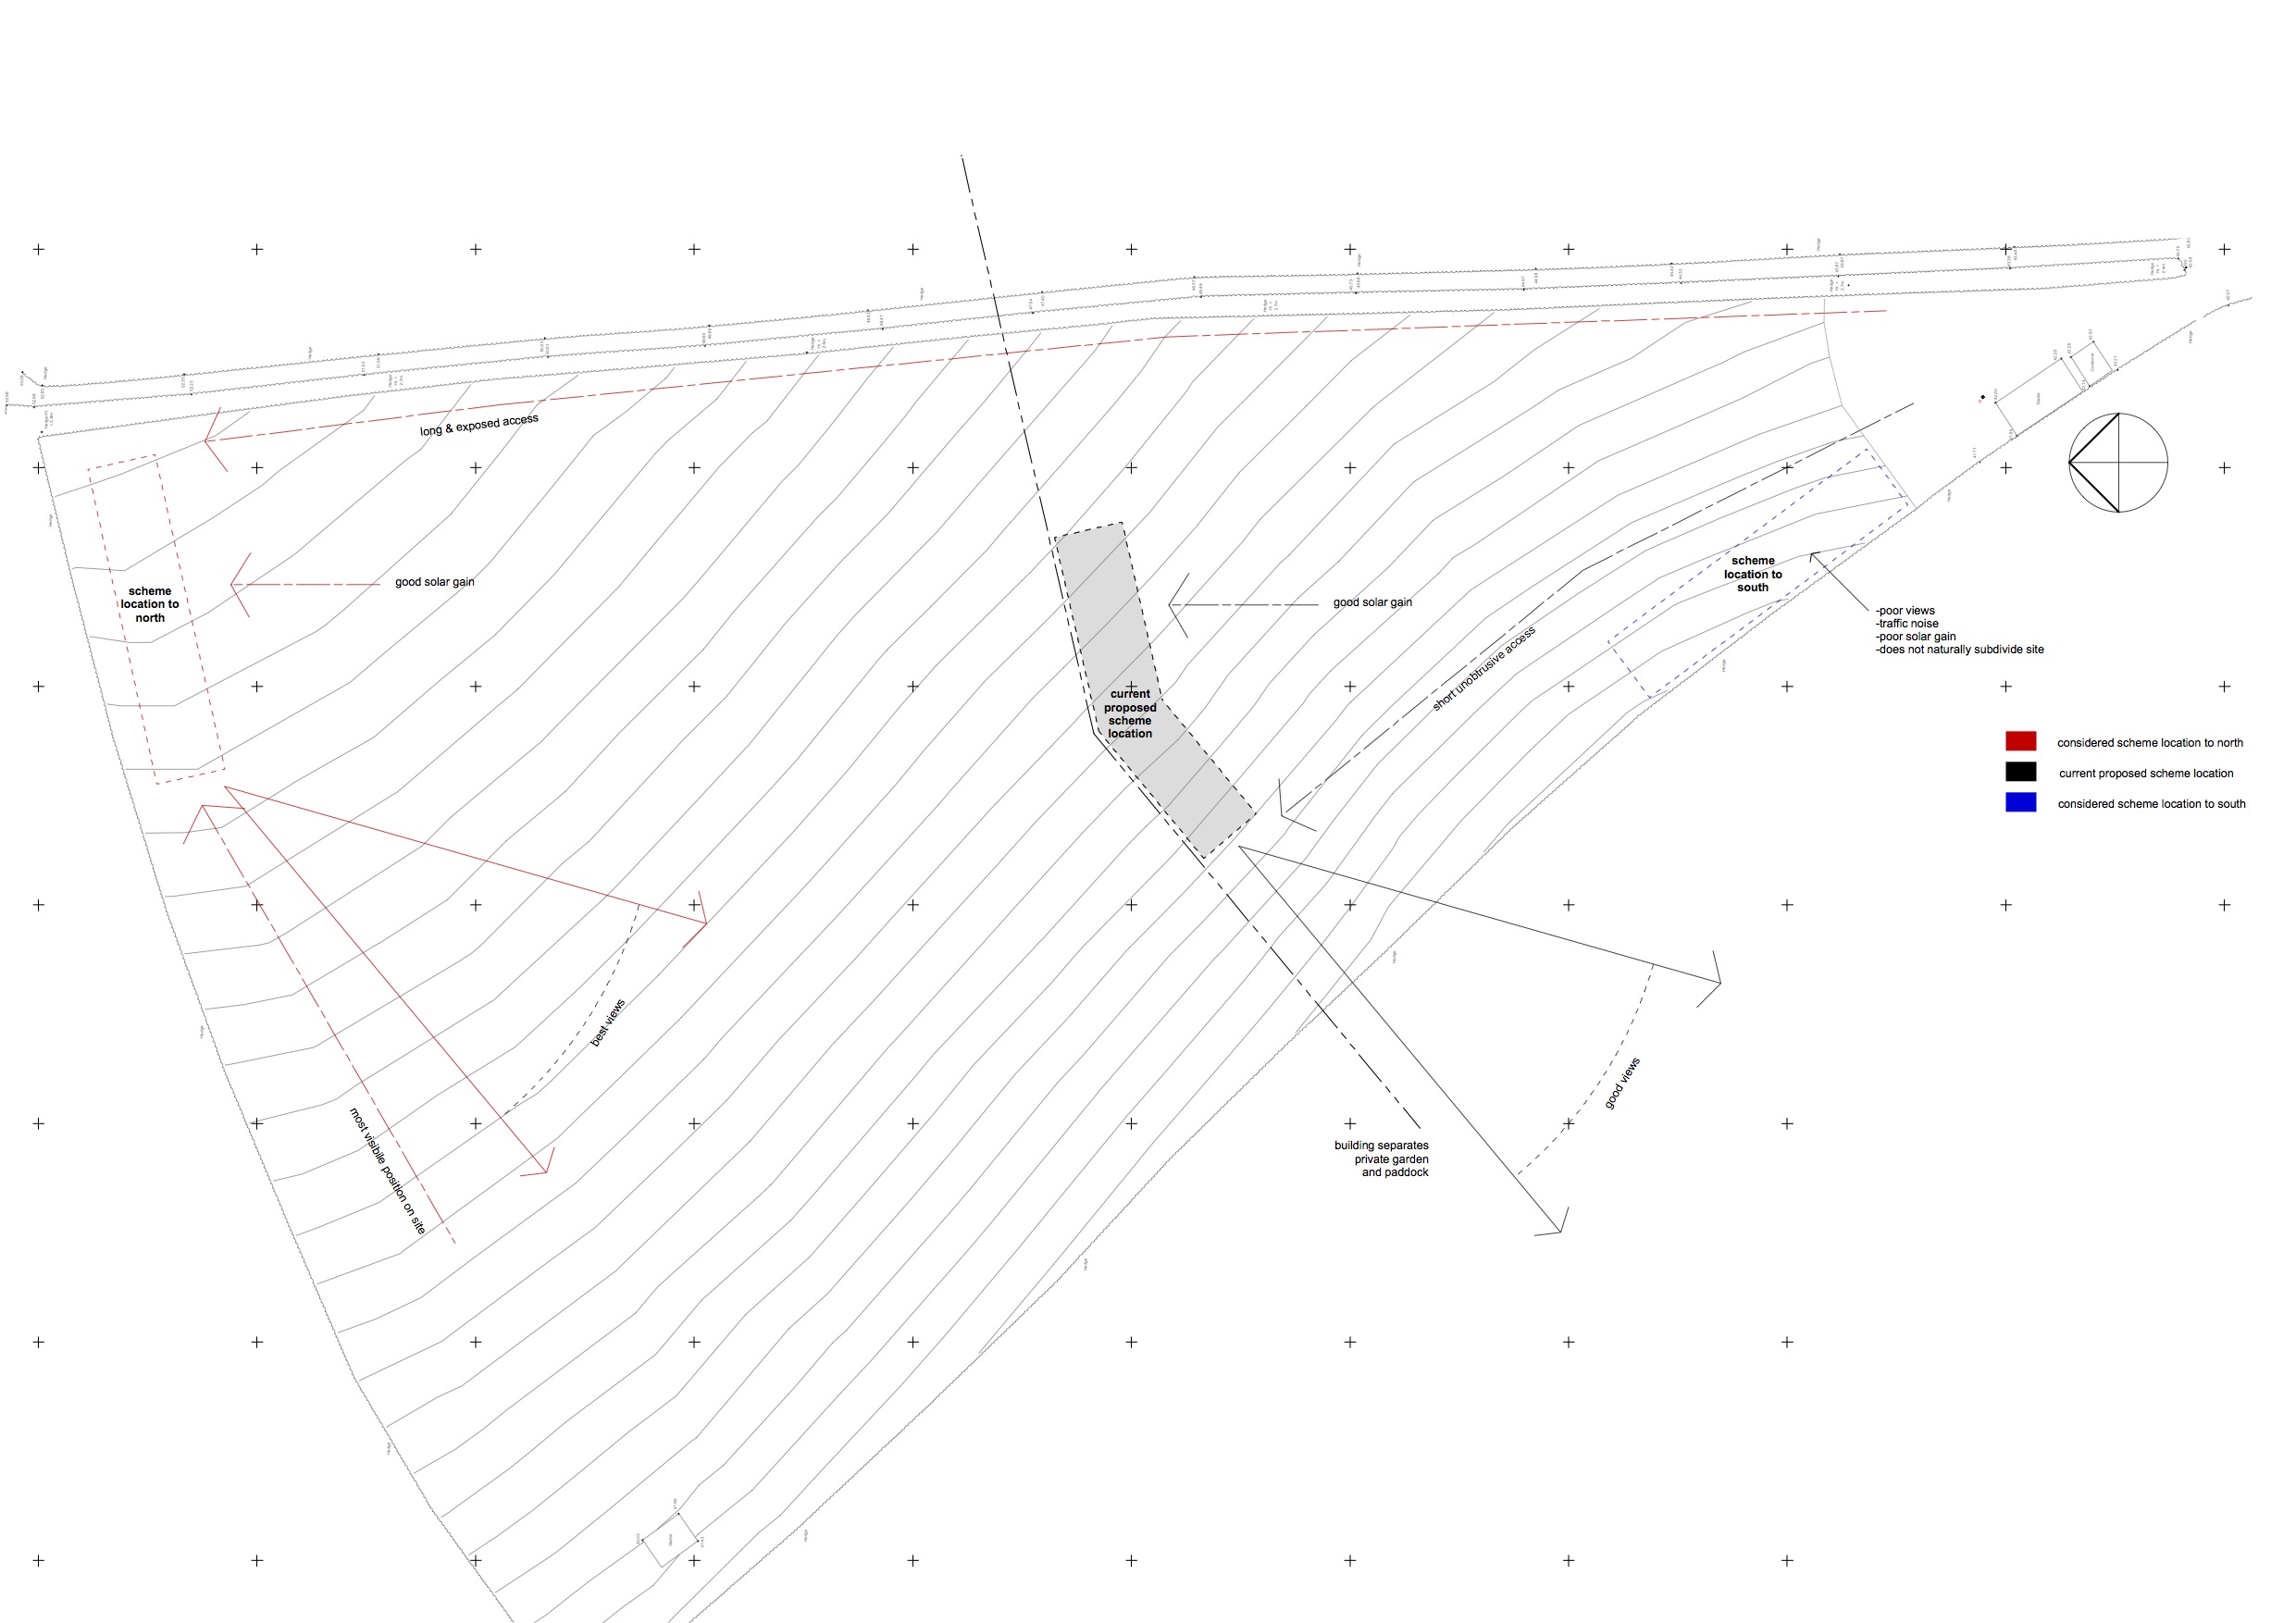
Step 3: Diagrams
We use diagrams extensively during the early stages of a project to make key decisions. We take the unique qualities of a site identified in step 1 and respond to these with a series of strategic diagrams. We test and refine these until a clear concept has emerged that can inform the building’s architecture. We find the best architecture can be described with a very simple diagram or diagrams.
We’ll also consider the Passivhaus standard at this early stage, if required, by completing an initial assessment in the Passivhaus Planning Package [PHPP]. If comfort and energy use are not considered at an early stage we find it becomes very difficult or costly to achieve full Passivhaus certification.
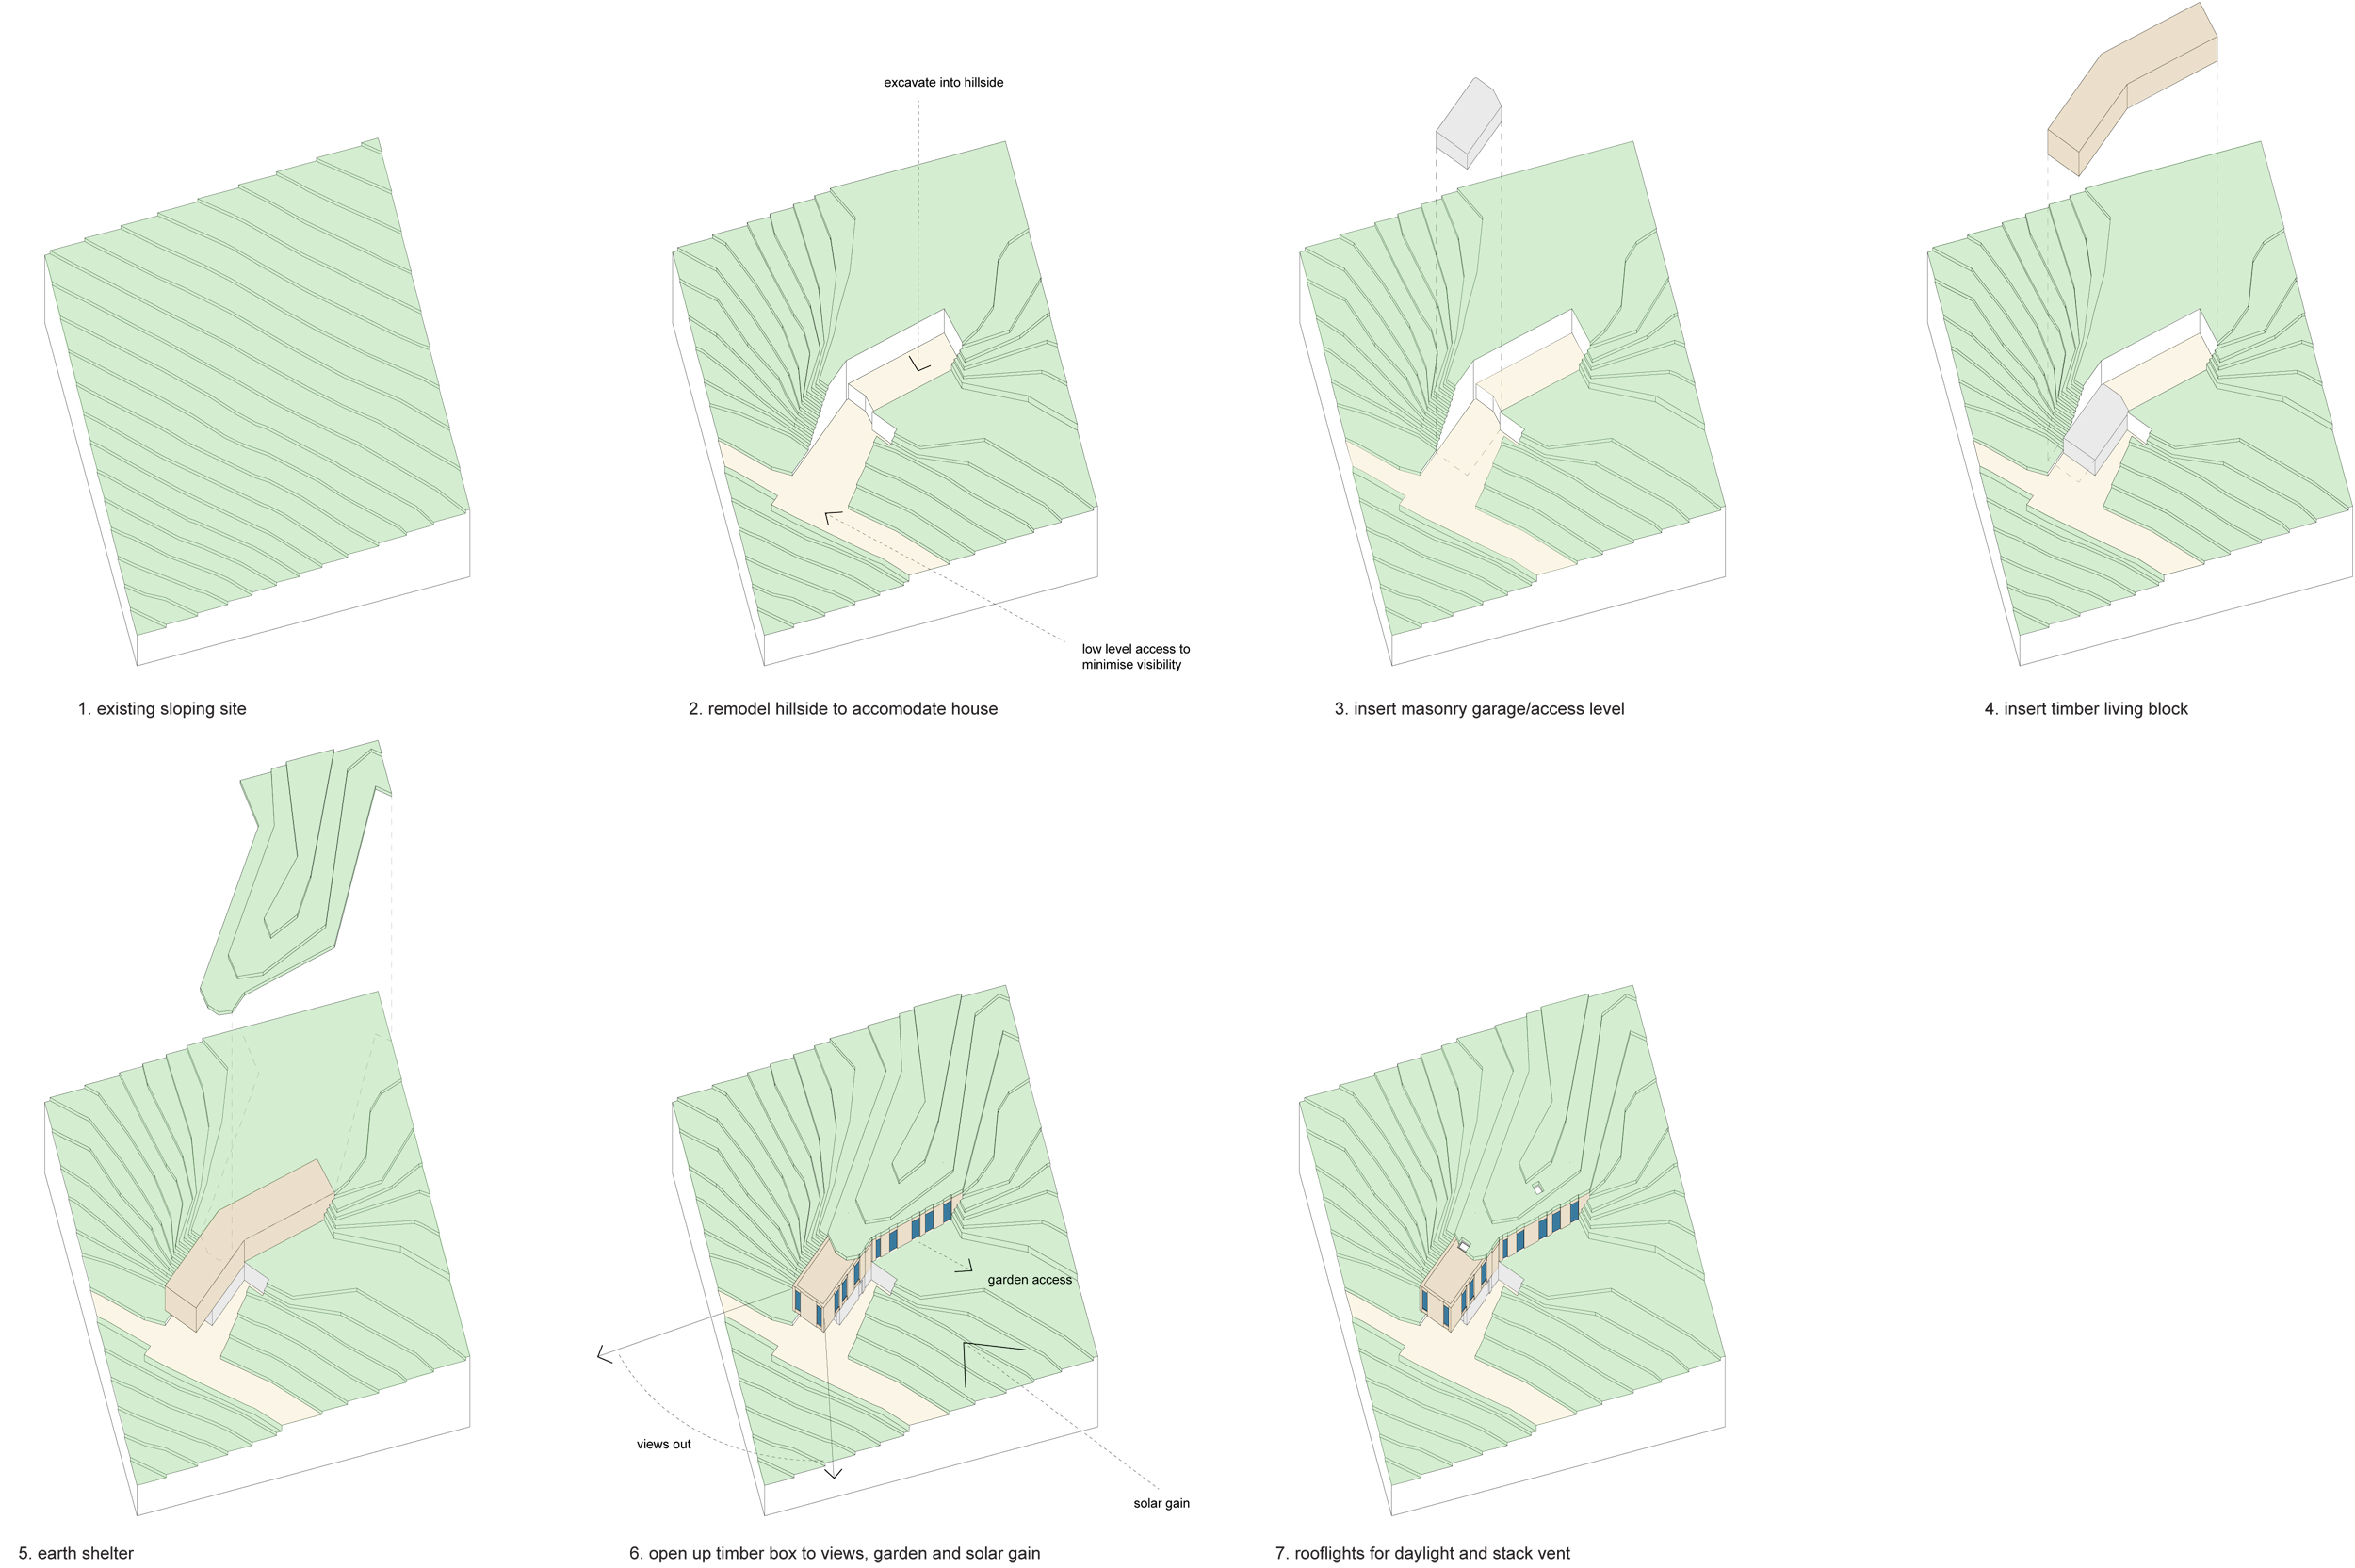
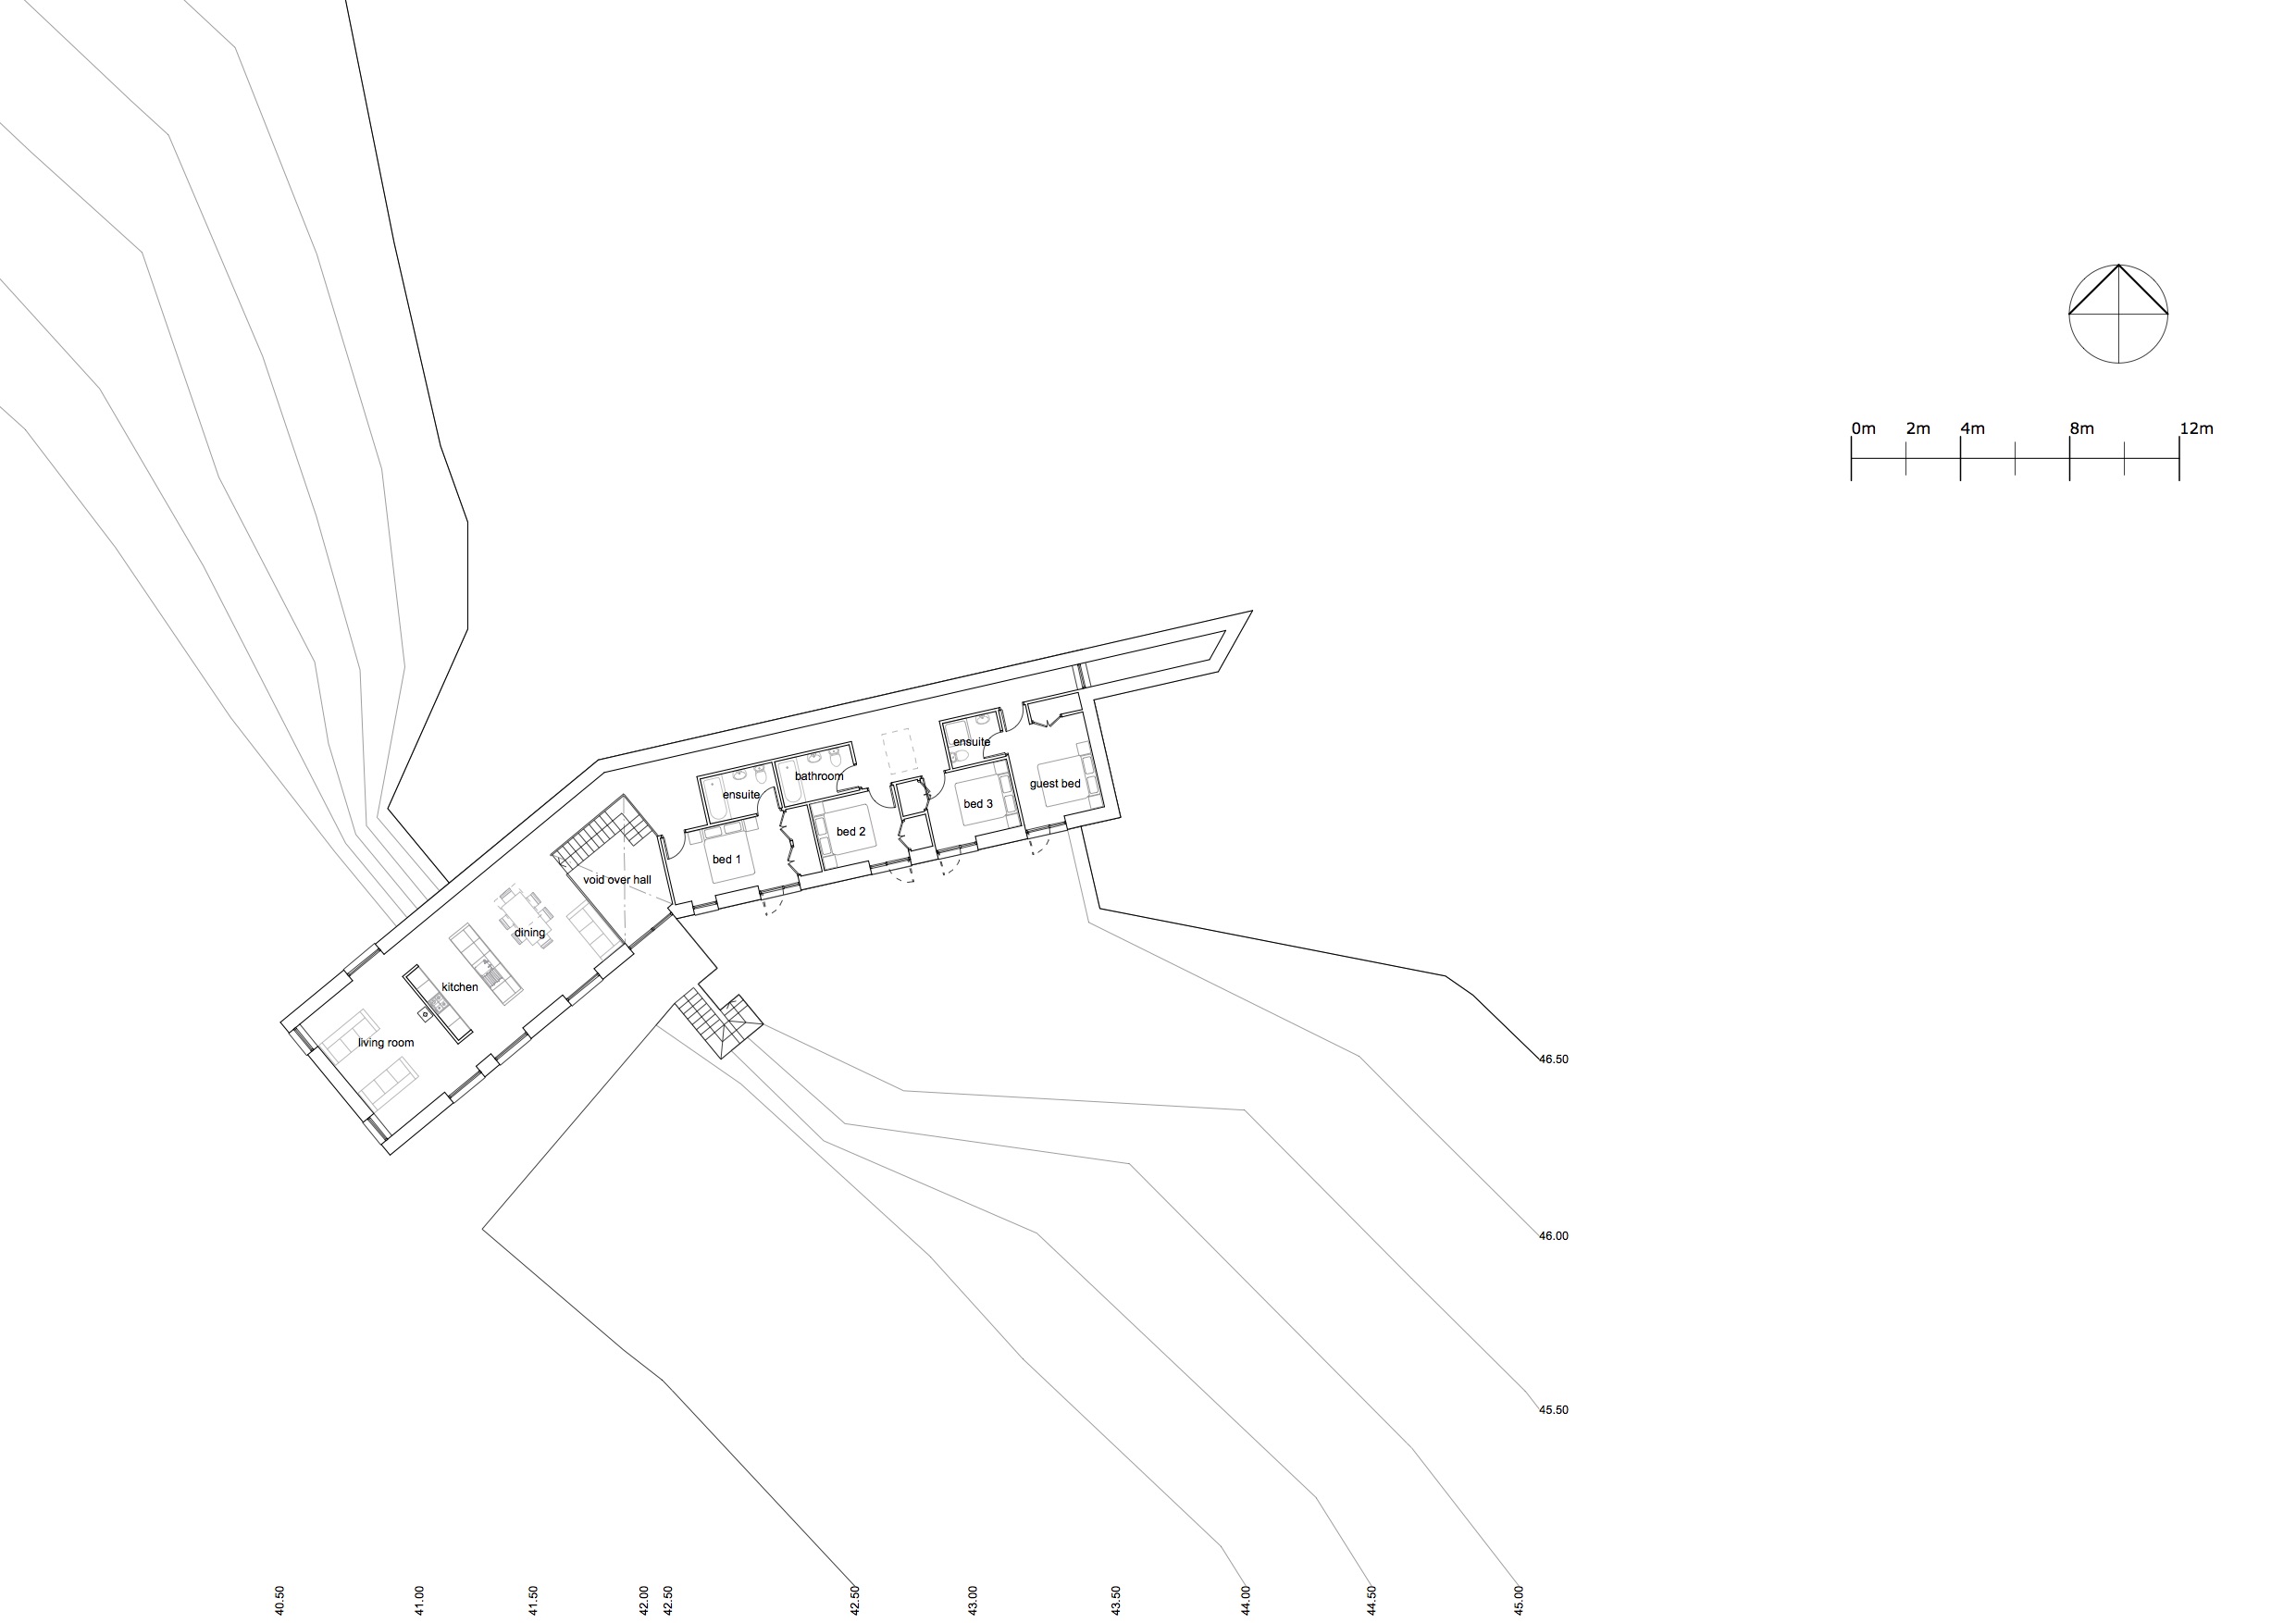
Step 4: Sketching & Model Making
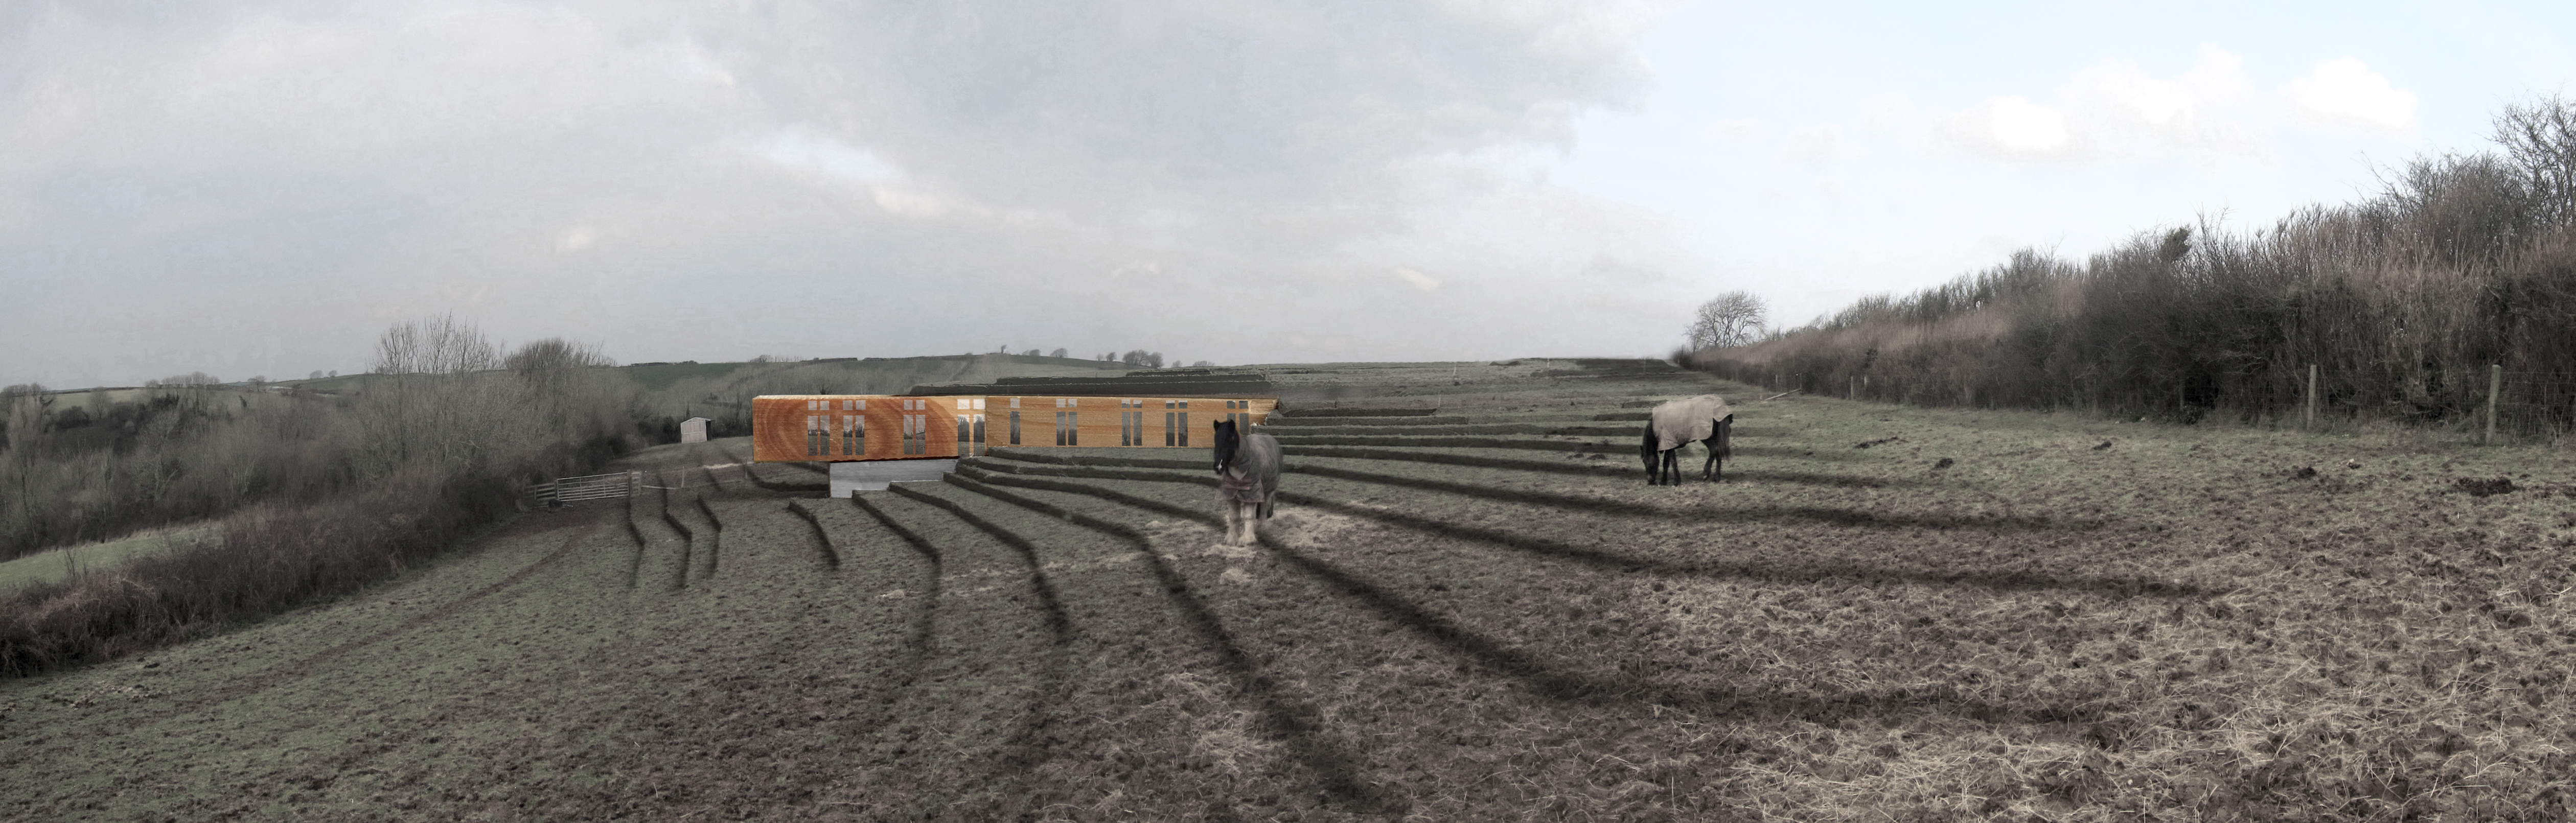
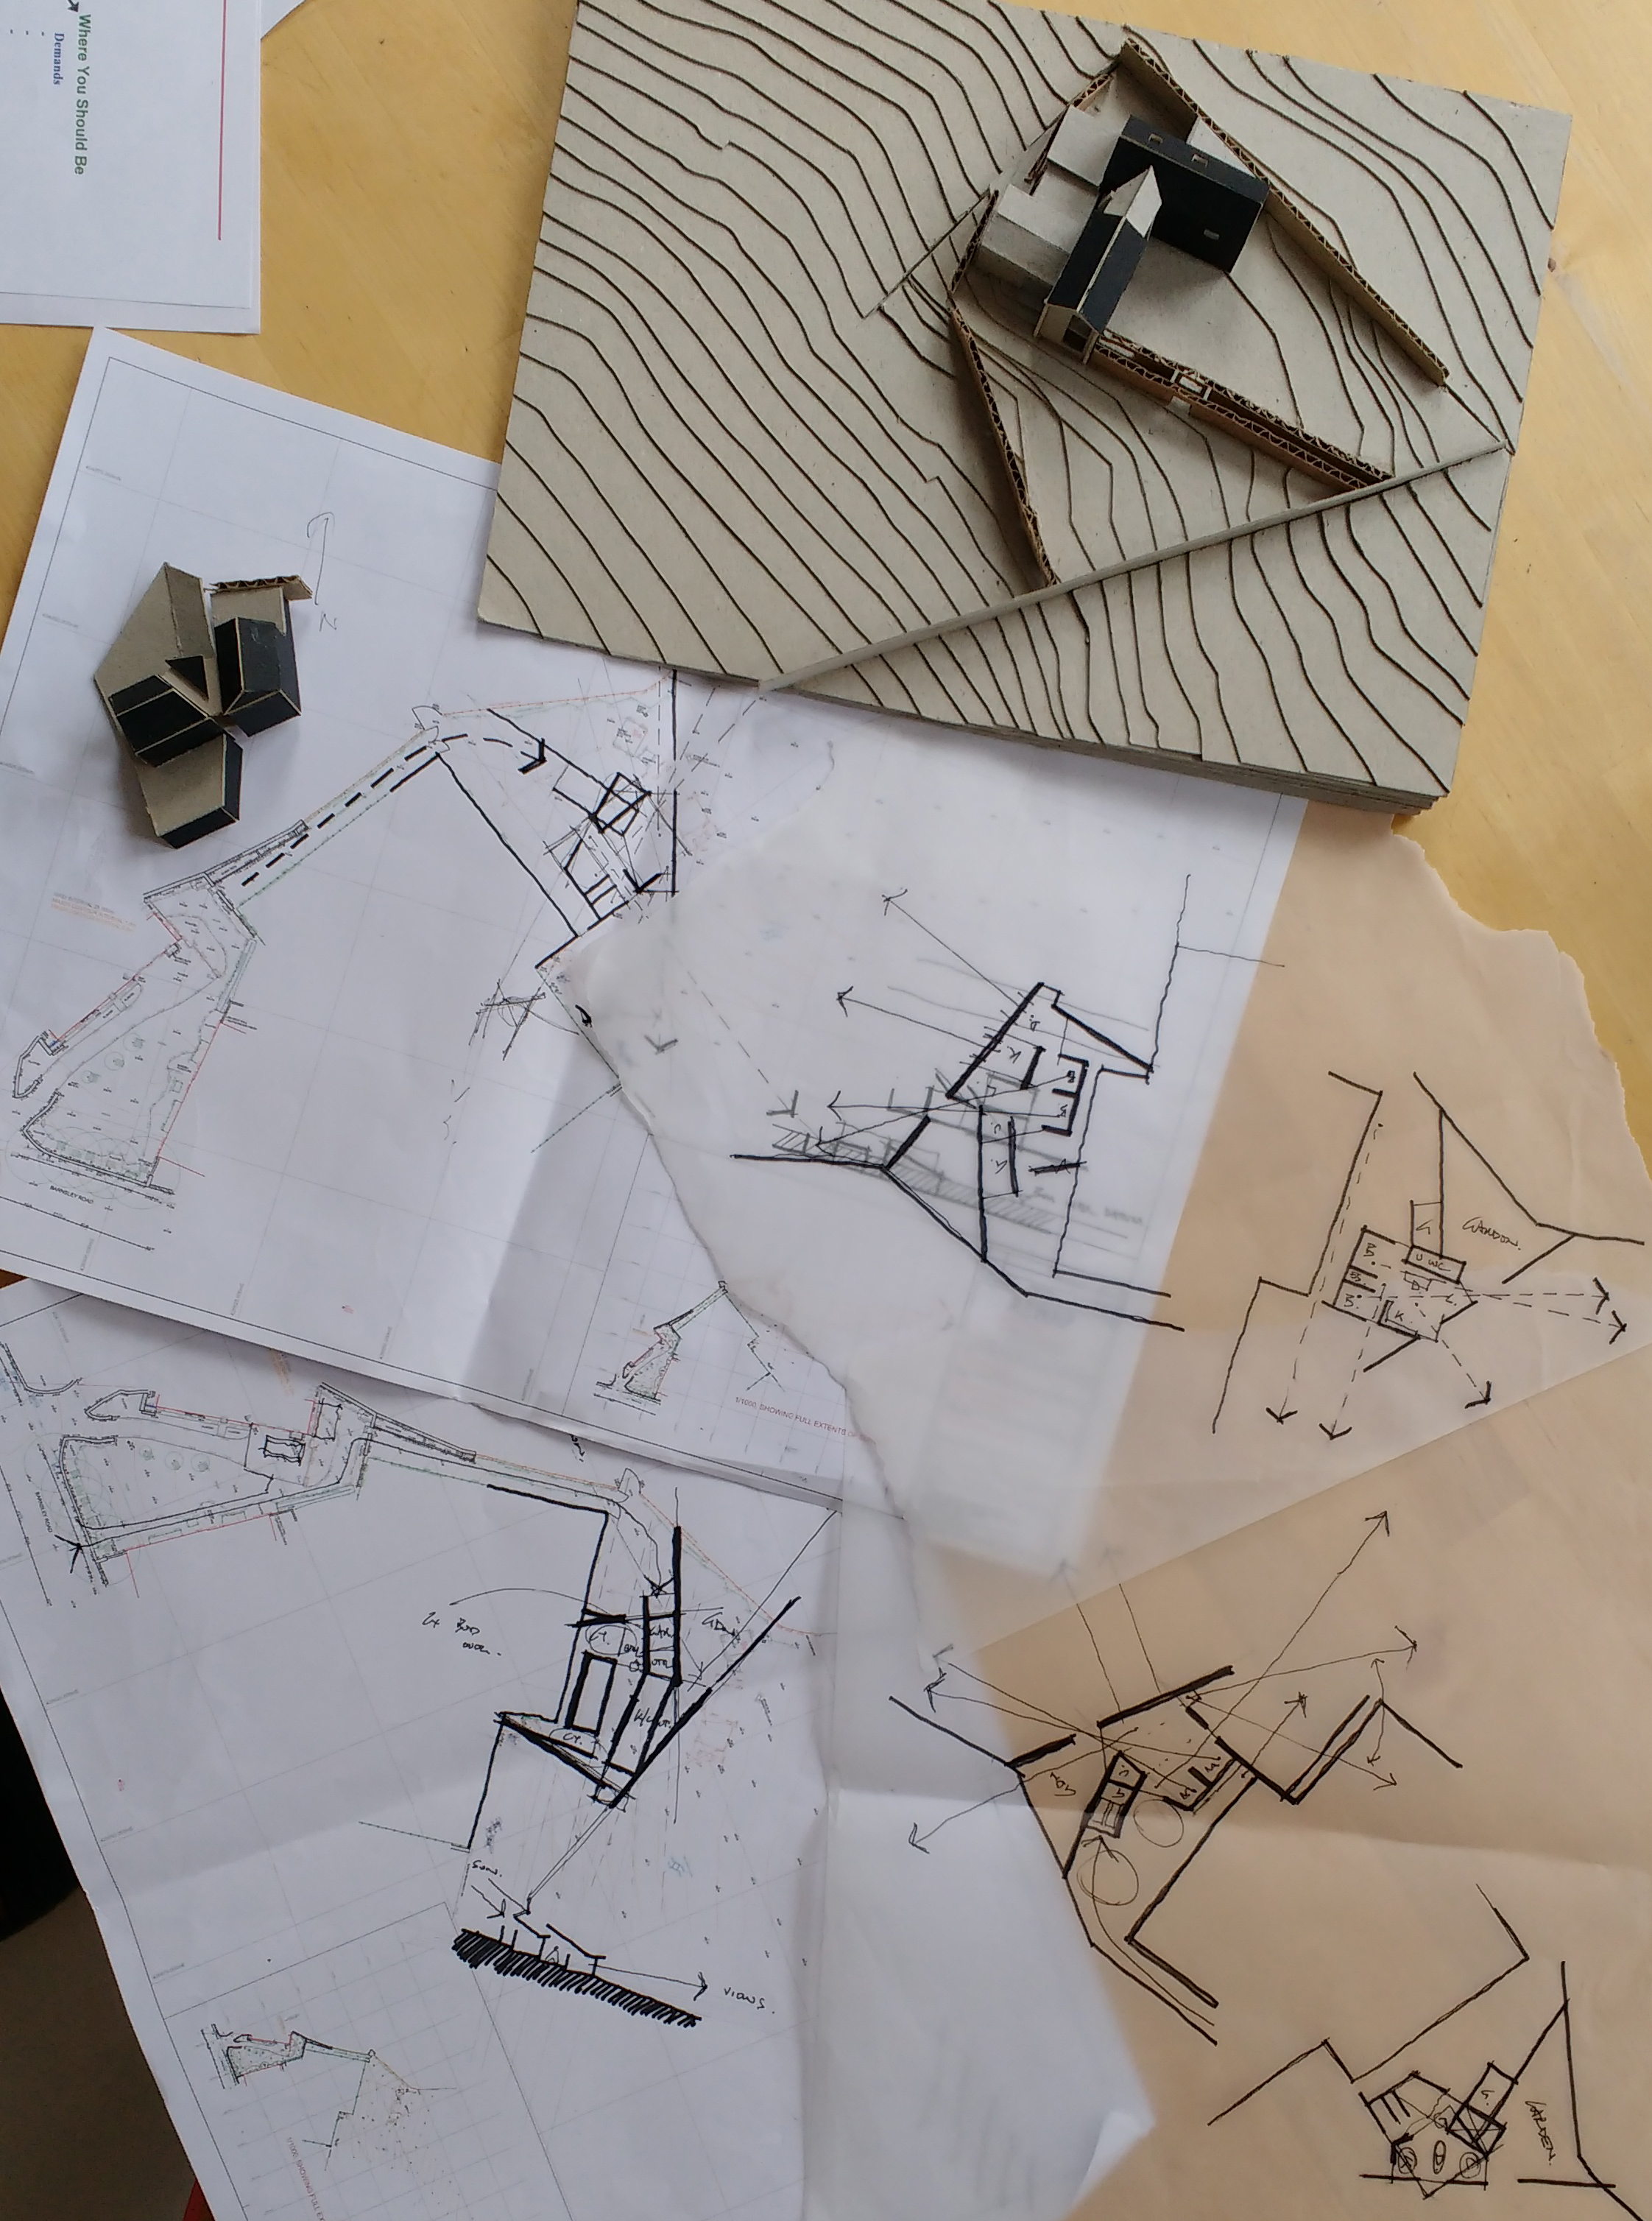
A basic plan will normally emerge from our concept diagram. We then use physical model making to explore the project in three dimensions: both internally and externally. Hand sketching, photo-montages and computer modelling can all be used to add to our design process at this stage dependent on the project.

Step 5: Test, Refine & Test Again
The design process is not linear. We test and refine our design by drawing, modelling and analysing it until we feel it is right for both the site and our clients. This is a vital step and one not to be missed out. Some architects may just present you with the first idea they have. For us, it is really important that our ideas have time to gestate and develop. This leads to the best designs and the happiest clients.
Step 6: “Final” Proposals
Once we have tested and refined our proposals we will produce a formal set of architectural drawings [plans, sections and elevations] along with some 3D visuals to fully explain our proposals to the planners. These proposals, however, are never final as we will continually refine the building during the planning process and right up to it starting on site.